
How to Create a Fashion Editorial or Lookbook: Step-by-Step Guide.
Hey there!
If you’re dreaming of creating a stunning fashion editorial or lookbook, whether you’re a photographer, art director, producer, set designer, stylist, retoucher, or just any creative soul who wants to break into the dazzling world of fashion photography — you’re exactly where you need to be.
Let’s be honest:
There are tons of expensive courses out there selling this information… but here, I’m giving it to you absolutely for free. Based on years of real-life experience shooting campaigns, editorials, and lookbooks for brands and magazines — I’m sharing everything I know to help you nail it!
No matter who you are:
This guide is your golden ticket. At Gossip Stone Magazine, we believe valuable information should be accessible to everyone. Pretty great deal, huh?
Editorial vs. Lookbook: What’s the Difference?
Alright, before we get started, let’s clear up a common confusion—editorials and lookbooks aren’t the same thing.
Lookbooks:
They are straightforward. What is their primary objective? Sell the product. Show features, DNA, and values that are meant to make potential buyers and customers think, “Wow, I want it!” or “I want to be part of this!”
Vibe: Clean, attractive, focused on the item.
Where it’s used: E-commerce, websites, and social media.
Creativity: Sure, but you have to stay inside brand guidelines and technical assignments (TA).
LOOKBOOK FOR BELLEMERE NEW YORK
The Bellemere FW22/23 collection lookbook focused on mixing softness and structure, with cozy cashmere in motion set against Parisian stone and traditional boulevards. Designed for modern city life, the collection mixes modest elegance, warmth, and wearable beauty.

Fashion Editorials:
View editorials as visual stories. These are creative, artistic projects typically published in magazines. They meant to tell a story, feature fashion trends, artistic ideas, and experimental concepts. With editorials, photographers and stylists have more freedom to express their vision.
Vibe: Creative, bold and rule-breaking.
Where it’s used: Magazines, portfolios and brand websites.
Creativity: The sky is the limit!
Both are cool. Both require proper preparation. However, knowing the purpose helps you create the right story.
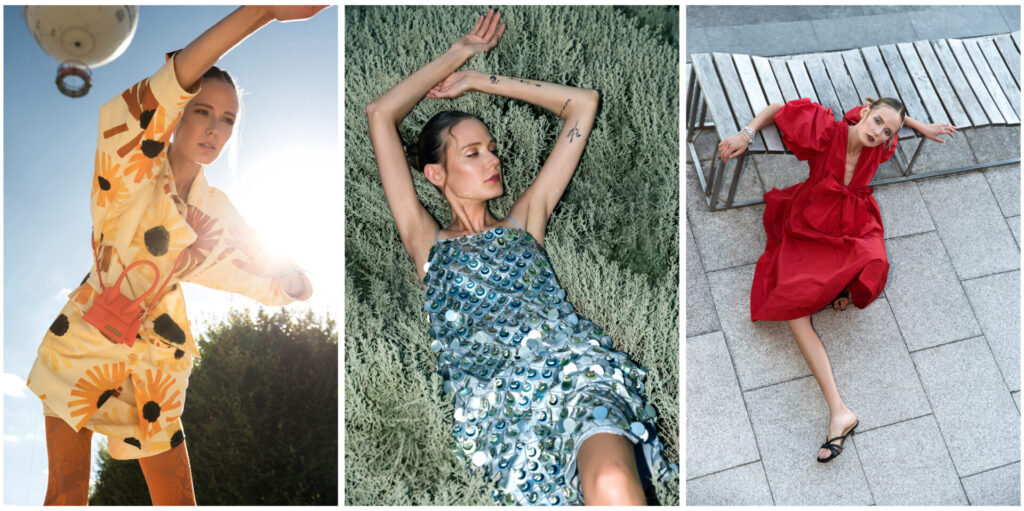
EDITORIAL “NEVER ENOUGH” FOR “KALTBLUT MAGAZINE”
This editorial “Never Enough” for Kaltblut Magazine is all about bold emotion, strong shapes, and raw light. The shoot plays with contrast — soft fabrics and powerful poses, modern buildings and wild nature. Every image tells a different mood, showing how fashion can feel dramatic, playful, and free all at once.
Now, let us get started!
Part 1: Idea – Where All the Magic Starts
Before the first flash goes off and before your model steps in front of your camera, everything begins with the idea.
It doesn’t matter whether you’re a world-famous photographer or just starting out — every great fashion shoot starts the same way: someone has a spark. A concept. A little dream that grows into a full story.
And you know what? Sometimes, coming up with this idea feels easy — you’re flooded with images and colors in your head. But let’s be honest — many times, it’s the opposite. You stare at a blank mood board, no idea where to begin, and it feels like you’ve already used all the good ideas in the world!
Don’t panic — it happens to all of us.
Even after years of experience shooting fashion campaigns, editorials, and lookbooks, I still sometimes need to “refill” my creative bank.
That’s why in this part, I’ll show you where and how to find those bright sparks again, how to build a strong visual concept from scratch, and how to organize everything so your whole team gets exactly what vibe you’re aiming for.
Ready to create something unforgettable? Let’s go!
1. Where to Get the Idea?
Ideas are all around us, but sometimes they can also be hidden.
Here’s where to look:
- Understand the brand: If it’s a brand project, look into their style, mood, values, and mission. What are they standing for?
- Read good magazines: If it’s an editorial, try to get its vibe. Glamorous, minimalistic, avant-garde?
- Analyze references: Get visual inspiration from recent shoots, campaigns, movies, and paintings.
Tip:
If a client gives you a technical assignment (TA), always follow it but still bring your own unique touch. If they ask for your ideas, surprise them with something fresh and unforgettable!
2. How to Find Inspiration?
Creativity is a muscle. Here’s how to train it:
- Books (fashion history, art, photography)
- Movies (Wes Anderson, Baz Luhrmann for color)
- Museums (hello, textures and shapes!)
- Everyday life (cafés, vintage stores, parks)
Online sources:
- Models.com
- Top fashion magazines: Vogue, Harper’s Bazaar, Numéro, Dazed
Photographers to follow:
Annie Leibovitz: Master of story portraits. @annieleibovitz
Craig McDean: From bikers to high fashion — raw, edgy, stylish. @craigmcdeanstudio
Peter Lindbergh Black-and-white raw beauty. Real emotions. Timeless storytelling.
@therealpeterlindbergh
Steven Meisel
The king of Vogue Italia and visual transformations. His editorials = mini fashion movies.
@stevenmeisel
Mario Testino
Luxury, glamour, effortless sophistication. Celebrity portraits and campaigns. @mariotestino
Inez & Vinoodh
Power duo creating high-fashion magic with dreamy, hyper-stylized looks. @inezandvinoodh
Tim Walker
A magician of fairy tales. Surreal, whimsical, eccentric style. @timwalkerphotography
Nick Knight
Futuristic, experimental, pushing boundaries of fashion imagery. Founder of SHOWstudio.
@nick_knight
3. How to Create a Mood Board?
A mood board = your visual bible.
It shows the idea to the team, keeps everyone aligned.
When creating a professional moodboard, always include:
✔️ Inspirational images for poses, model vibe, mood
✔️ Lighting style reference (natural light, studio, harsh, soft)
✔️ Makeup and hair styling examples
✔️ Set design or location reference
✔️ Color palette
— A few swatches or a color mood guide so the team understands the visual atmosphere (warm, cold, vibrant, muted).
Without a color palette, your moodboard is incomplete.
Colors create mood faster than words.
Important:
Create different mood board sections for:
- Client/brand
- Photographer
- Stylist
- Hair & makeup artist
- Retoucher
Pro Tip:
Send model’s photos with your desired hair and makeup looks to the MUAH team in advance. Saves a lot of time and mistakes!
Where to Find Moodboard Samples + Important Tips
If you’ve never made a moodboard before or you just want some visual templates to start with, here’s where you can find moodboard examples:
Instagram: Search hashtags like #fashionmoodboard or #editorialmoodboard.
Pinterest: Search for “fashion moodboard,” “editorial moodboard,” “lookbook moodboard.”
Canva: Free online templates. Easy drag-and-drop to create your moodboard.
Behance: Search for “fashion photoshoot concepts” or “moodboard inspiration.”
4. What’s a Pull Letter?
Pull Letter = Golden Ticket
It’s an official letter from a magazine that allows a stylist to borrow clothes from designers and PR Agencies for free (on the condition of publication).
- Who needs it: Stylists
- Who gives it: Magazine editors
- Why: Without it, most probably no one will lend you samples for your shooting.
Pull letters open doors to luxury fashion pieces you can’t usually afford. So… yes, they’re kind of a big deal.
Important Tips for Pull Letters:
- Always send from a real official magazine email if possible.
- Never promise publication unless it’s guaranteed.
- Add moodboard and shoot concept if the brand or the magazine asks.
Sample Pull Letter Template
And here’s a real basic Pull Letter Template you (or your stylist) can use when requesting clothing loans:
📄 Pull Letter Sample
[Magazine Logo/Header]
[Magazine Name]
[Magazine Website]
[Magazine Contact Info]
Date: [Insert Date]
To Whom It May Concern,
This letter is to confirm that [Stylist Name] is pulling clothing and accessories exclusively for an editorial photoshoot to be published in [Magazine Name], a [monthly/quarterly] fashion and lifestyle publication.
The shoot is scheduled for [Shoot Date], and will feature [Model Name(s)] photographed by [Photographer Name].
All credited designer pieces will be properly credited in the final publication.
We assure that all items will be treated with the utmost care and returned in perfect condition.
Please feel free to reach out to [Contact Person Name] at [Phone Number] or [Email Address] for any further details or confirmation.
Thank you for your support.
Sincerely,
[Editor’s Full Name]
[Editor’s Title]
[Magazine Name]
Part 2: Building the Dream Team – Your Shooting Superpower
You know, one thing I learned after many years shooting fashion is this:
You’re Only as Good as Your Team!
Even the best photographer cannot create magic alone.
Stylists, models, makeup artists, assistants — every single person you invite to the project is a brick in the wall of your success. Choose the wrong one, and the whole thing can collapse. Choose right, and you’ll build something unforgettable. Never underestimate the importance of any role. Everyone matters!
Your team = your superpower. A strong team = 80% of success. Let’s talk about how to build it.
1. Model Scouting: How to Choose the Right Face?
The model is the face of your project. Models are the heart of the shoot. Literally! They can either elevate your concept — or drag it down badly.
When choosing your model, think about:
- Their connection to your story and moodboard
- Their posing skills (trust me, it matters so much)
- Their professionalism (no-shows are sadly real)
- Their ability to express emotions (blank stares kill fashion photos)
⚠️ Red Alert for Beginners:
Avoid taking a random “pretty girl next door” just because she’s cheap/free.
Here’s why:
- She won’t know her best angles
- You’ll spend hours micromanaging poses
- She might freeze in front of the camera
- Clothing could look cheap if not worn professionally
- Post-production will take double the time to fix issues
You risk ending up with amateurish, unpublishable results.
Save the “helping friends” vibe for test shoots.
For real projects — work with real models.
Where to Find Models?
🖤 Model Agencies
- Contact local agencies.
- Ask for “new faces” available for editorial work (often free in exchange for publication).
- Examples: Elite Models, IMG, Next Models.
🖤 Portfolio Sites
🖤 Social Media Groups
- Search on Facebook: TFP Model groups (Time For Print = collaboration)
- Instagram: Use hashtags like #modelsearch #modelcastingcall
2. Finding a Stylist, Makeup Artist, and Assistant
Finding the right creative partners is just as important as finding the right model.
Where to search for team members:
- Instagram: Search local hashtags like #parismakeupartist #londonfashionstylist
- Facebook Groups: TFP collaborations
- Model Mayhem: Tons of creatives looking for shoots
- Behance: For very artistic stylists and MUA portfolios
- The Dots (for UK creatives): https://the-dots.com
- Freelancer sites: Upwork, Freelancer
How to Choose the Right Creative Partners?
👀 Look at their portfolios
(And not just the first 3 photos.)
✅ Do their style match your moodboard?
✅ Are their references professional brands or just small side gigs?
✅ Have they worked on serious campaigns or editorials before?
Be picky.
A sloppy makeup artist or a careless stylist can destroy all your hard work.
Responsibilities of Team Members – Who Does What?
Quick guide so you’re not confused on set:
| Role | Main Responsibilities |
|---|---|
| Art Director | Main idea, moodboard, supervise creative concept |
| Photographer | Camera settings, lighting, shot framing, photo selection |
| Videographer | Shoot video, edit clips for campaigns |
| Producer | Organize team, locations, schedule, budget, manage the day |
| Wardrobe Stylist | Select outfits, coordinate looks, assist dressing |
| Makeup Artist & Hair Stylist | Transform model’s look to fit moodboard |
| Wardrobe Assistant | Help stylist with outfit prep and returns |
| Photography Assistant | Lighting help, backstage shots, extra angles |
| Multitasking Assistant | Carry stuff, manage props, behind-the-scenes videos |
| Retoucher | Final polish: skin, color correction, creative retouching |
✅ Important: EVERY person on set matters. No job is “small.”
You’re a team — and teamwork creates magic.
Part 3: Contracts, Releases, and Call Sheets – Setting Things Right
Why Contracts and Model Releases Matter
Trust me, this is not boring legal stuff — it’s your protection.
Without signed releases and contracts:
- You can’t legally use the images
- Magazines might reject your submission
- Brands can sue you (yes, even for collaborations!)
Always have contracts ready. Always.
Where to Get Release Templates?
- Easy Release App (iOS & Android) – best mobile app for contracts on the go
- ModelReleaseApp – another good app
- Docracy.com – free legal templates
- ShootProof.com – simple downloadable forms
Key Points to Include in Contracts:
- Purpose of shoot (editorial, commercial, TFP)
- Usage rights
- Payment details (if any)
- Model’s consent to publish, retouch, modify images
🔔 If your model is under 18 — you MUST have their parents/guardian sign the model release too!
What Happens Without Contracts?
- You can’t legally publish or sell the photos
- Models may request photo removal later
- Your editorial submissions might get rejected
- Lawsuits (yes, it happens even in TFP projects)
No signed papers = no shoot. Simple.
📄 Sample TFP Model Release Form
MODEL RELEASE AGREEMENT (TFP)
Time for Print Collaboration
This agreement is made on [Date] between:
Photographer/Production: [Full Name / Studio Name]
Address: [Photographer Address]
Email: [Photographer Email]
Phone: [Photographer Phone]
AND
Model: [Model Full Name]
Address: [Model Address]
Email: [Model Email]
Phone: [Model Phone]
Date of Birth: [DOB] (If under 18, parental/guardian signature required)
1. Project Description:
This agreement refers to a TFP (Time for Print) photo session held on:
Date: [Shoot Date]
Location: [Location Name & Address]
Concept/Theme: [Fashion editorial, beauty lookbook, etc.]
2. Usage Rights:
The model grants the Photographer the right to:
- Use and edit the images from the session for personal portfolio, website, social media, magazine submissions, exhibitions, and marketing purposes.
The model agrees not to use the images for commercial purposes (advertising, resale, etc.) without prior written permission from the Photographer.
The Photographer agrees to:
- Provide [X number] of edited images within [X days] from the shoot date.
- Credit the model in publications and social media when possible.
3. Ownership:
The Photographer retains full copyright of all images taken during the shoot.
4. Model Consent:
The model confirms they are participating voluntarily and without payment, and have no objections to their image being used in the ways described above.
5. Model’s Confirmation:
Signature of Model: ____________________________
Print Name: ____________________________
Date: ____________________________
If under 18:
Parent/Guardian Signature: ____________________________
Full Name: ____________________________
Phone: ____________________________
Date: ____________________________
Signature of Photographer: ____________________________
Print Name: ____________________________
Date: ____________________________
Notes:
✔️ You can print this or use it via Easy Release or Model Release App.
✔️ If it’s a bigger team, you can attach an appendix with the team member names.
✔️ Add a section for image delivery terms (Google Drive, WeTransfer, etc.) if needed.
What’s a Call Sheet?
A call sheet is your shooting day’s Bible.
It includes:
- Shooting date and time
- Location(s) + parking info
- Contacts of everyone
- Shooting schedule (arrival times, breaks, wrap time)
- Outfit plan
- Special notes (food allergies, vegetarians, etc.)
Fun Fact:
In France, if a shooting lasts over 4 hours — you must provide lunch for your team!
✔️ Knowing team food preferences (vegetarian, allergies) is a small gesture but shows huge respect.
📄 Sample Call Sheet Template
CALL SHEET
Production Title: [Name of Project or Editorial Name]
Date: [Shooting Date]
Location: [Studio/On-Location Address]
Call Time: [HH:MM]
Expected Wrap Time: [HH:MM]
🧑🤝🧑 CREW & TALENT CONTACTS
| Role | Name | Phone | ||
|---|---|---|---|---|
| Photographer | [Full Name] | [Phone] | [Email] | @yourphotohandle |
| Producer | [Full Name] | [Phone] | [Email] | @producerhandle |
| Stylist | [Full Name] | [Phone] | [Email] | @stylistgram |
| MUAH Artist | [Full Name] | [Phone] | [Email] | @makeupguru |
| Model(s) | [Names] | [Phone] | [Email] | @modelpage |
| Assistant(s) | [Names] | [Phone] | [Email] | @assistantname |
| Videographer (if any) | [Name] | [Phone] | [Email] | @videoperson |
✅ Including Instagram usernames in your call sheet makes tagging easier post-shoot and helps everyone cross-promote efficiently.
⏰ SCHEDULE
| Time | Activity |
|---|---|
| 08:00 | Crew arrival + Setup |
| 08:30 | Model arrival + Hair & Makeup starts |
| 10:00 | Look 1 shoot |
| 11:00 | Look 2 shoot |
| 12:00 | Break / Lunch |
| 12:30 | Look 3 shoot |
| 13:30 | Look 4 shoot |
| 15:00 | Final touch-ups + close-up shots |
| 16:00 | Wrap & team breakdown |
📦 WARDROBE & BEAUTY LOOKS
| Look # | Description | Stylist Notes | Makeup & Hair Notes |
|---|---|---|---|
| 1 | [Short look desc.] | [e.g., bold jewelry] | [e.g., clean glam, side part] |
| 2 | … | … | … |
Please refer to the moodboard PDF attached.
🧭 LOCATION INFO
- Address: [Studio or on-location address]
- Parking Info: [Details if any]
- Wi-Fi: [Network + Password]
- Weather Notes: [If outdoors – include forecast and backup plan]
🥗 CATERING & DIETARY INFO
Lunch provided at [Time].
Please notify the producer of:
- Allergies
- Vegetarian/Vegan preferences
📝 FINAL REMINDERS
- Please arrive on time and ready to work
- No photos posted before image release without approval
- Respect the creative direction and moodboard
- Keep backstage content confidential unless discussed
Moodboard, inspiration shots, and reference links attached in PDF/email.
Let’s create something beautiful!
✅ You’re now legally and logistically ready for a professional production.
Part 4: Shooting Preparation – The Work Before the Work
Let me be honest with you:
The real work often happens before the shutter ever clicks.
A successful fashion editorial or lookbook shoot is 80% preparation, 20% camera time.
Prepping well means avoiding stress, delays, or costly mistakes on the big day.
Let’s go step-by-step through everything you need to organize ahead of time:
1. Choosing and Scouting the Right Location
Location is your co-star. It sets the mood, adds depth, and gives your story context.
You have two main choices:
🖤 Studio – Blank canvas. Controlled lighting. Great for product focus or minimal editorials.
🖤 On-Location – Adds character, natural textures, unique light, and real-world vibes.
Things to Consider When Picking a Location:
- Does it match your story and moodboard?
- Do you need natural light or artificial light?
- Will it allow full-body shots and lighting setups?
- Is there power, restrooms, heating, mirrors?
Tips for Studio Shoots:
✔️ Choose a space with no or covered windows (for full light control)
✔️ Visit it in advance (studio websites are often outdated!)
✔️ Ask what lights and modifiers are included
✔️ Make sure there’s enough distance to shoot full-length looks
✔️ Bring blackout cloths or paper to control ambient light if needed
Tips for On-Location Shoots:
✔️ Check if permits are required — many public spaces like:
- Museums
- Historic buildings
- Government areas … don’t allow commercial photo shoots without permission
✔️ In Paris for example, you can’t shoot the illuminated Eiffel Tower at night commercially — it’s copyrighted by Société d’Exploitation de la Tour Eiffel.
✔️ Always scout your location a few days before. Even if you’ve shot there before, things can change:
- Renovations
- Scaffolding
- Restricted access
- Parking gone
Hotel Room Tip:
Sometimes I book a hotel room near the main location a day before.
Why?
- The client or stylist can prep outfits
- Models can get ready in comfort
- All clothes, shoes, accessories are stored safely and organized
It’s especially helpful when shooting in a cold season or at dawn — no one wants to change behind bushes!
2. Studio Preparation
If you’re using a studio for the first time:
✔️ Visit it personally to double-check layout, lighting, and gear
✔️ Check ceilings (important for boom stands or high backdrops)
✔️ Meet the assistant or studio tech if available
✔️ Mark zones for makeup, changing, equipment setup
✔️ And yes — bring snacks, coffee, and water for your team. It keeps morale up and helps everyone stay productive longer.
3. Preparing the Wardrobe
Clothing is the star of the show in both editorials and lookbooks.
Here’s how to keep things smooth:
✔️ Do a fitting in advance with the model(s)
✔️ Create and save look photos (even iPhone pics are fine!)
✔️ Send all looks to the client for approval (if applicable)
✔️ Steam/iron everything a day before and hang on racks
✔️ Pack extras: pins, tape, safety pins, shoes in multiple sizes
Always bring more accessories than you think you need.
Trust me — you’ll thank yourself later when something doesn’t “pop” on camera.
4. Preparing the Model
So you found a great model? Awesome. Now prepare her like a pro.
First rule: Never assume the model will show up ready.
If you’ve never met her in person — especially if booked online and not through a trusted agency — have a Plan B model on standby.
I’ve had models show up with:
- Unretouched acne
- Wrong haircut
- Dyed hair without mentioning it
- Heavy tan or body piercings I didn’t expect
- …Or worse, they just didn’t show up
It happens. Be prepared.
Model Preparation Checklist:
Model Preparation Checklist:
Share the moodboard and references well before the shoot
Confirm she knows the exact beauty look expected
Ask her to arrive with:
Clean hair
No makeup
No body lotion (can mess up makeup)
Clean nails (nude polish or bare)
No visible body hair (if required)
If shooting lingerie or swimwear: ✔️ Provide a fresh robe so the model avoids clothing marks before the shoot
💡 Pro Tip:
If she’s freelance, meet her a few days before for a coffee, skin check, and quick chat. You’ll understand her vibe, comfort level, and posing confidence.
A successful shoot is 80% prep and 20% camera.
Part 5: The Shooting Day – Bringing the Vision to Life
So the day has finally come. Moodboard? Check. Team? Ready. Location? Booked. Clothes? Steamed.
Now it’s time to create some visual magic.
Whether you’re shooting a brand lookbook, a personal editorial, or a campaign — the shoot day is a production.
It’s fast, chaotic, inspiring, and sometimes stressful. But if you’ve done the prep right (which you have, because you’re reading this), it can also be smooth and deeply satisfying.
Here’s how to run your shoot like a pro.
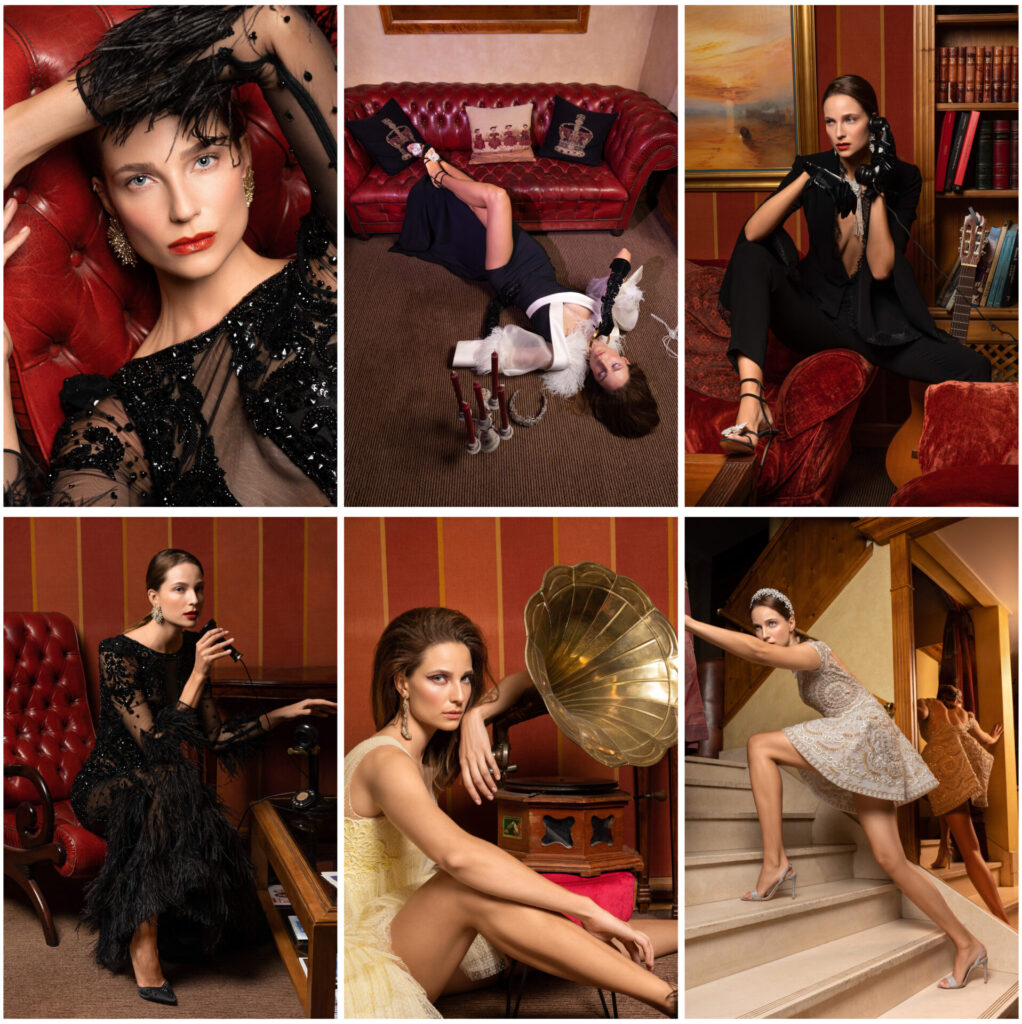
EDITORIAL “MIDNIGHT IN PARIS” FOR ELLE KAZAKHSTAN
“Midnight in Paris” is inspired by old films, velvet textures, and powerful feminine moods. Every look is a story of elegance, mystery, and late-night glamour. Shot in a vintage Parisian hotel, this editorial mixes high fashion with old-world charm and drama. Every image feels like a cinematic still — rich, romantic, and a little bit secret.
1. Organizing the Set
The first person on location?
You. Or your producer.
Arrive early and:
- Walk through the space
- Test lighting if indoors
- Prep your gear
- Set up makeup and styling zones
- Print or display the moodboard in a visible place
Why? It sets the tone for the team and makes you look professional.
Moodboard Display = Gamechanger
📌 Tape it on the wall.
📱 Keep it open on an iPad or laptop.
Your team needs to keep referencing it during the shoot. It helps everyone stay aligned visually — from stylists adjusting collars to makeup artists tweaking lip color.
2. Lighting Setup: Safe, Clean, Smart
If you’re shooting in a studio:
- Set up your lights before the model arrives
- Make sure all cables are taped down
- Use sandbags on boom stands — safety first!
Even experienced photographers sometimes overlook small things. I’ve seen softboxes fall mid-shoot and break lenses. Don’t let it happen to you.
Some Common Light Setups (just to refresh your brain):
- Clamshell lighting – Great for beauty shoots (softbox above + reflector below)
- Split lighting – Dramatic fashion vibe (light from one side)
- Rembrandt – Perfect for portraits with a classic look
- Backlighting – For dreamy, glowing edges in editorials
- One-light setup – Minimal, editorial, edgy
💡 Know in advance what lighting setup will best tell your story. You can always experiment later — but come in with a plan.
3. Your Tech Setup – No Surprises Allowed
This is your battlefield. You should know your weapons.
Here’s what to double check:
- All batteries fully charged
- Memory cards formatted and empty
- Laptop/tablet set for tethered shooting (if you use Capture One, Lightroom, etc.)
- Backups of your gear (camera body, lens, trigger)
- All lights and syncs working
- Test shot with stand-in model or assistant before model steps in
Don’t try new software on shoot day. If it’s your first time using it — test it at home first.
4. Working With the Model
This is where your energy really matters. Your communication and atmosphere will decide the quality of the final images.
How to work with your model effectively:
✔️ Talk. Guide. Encourage.
Models aren’t mind-readers. Don’t just click silently — speak up!
✔️ Give clear posing directions but let her improvise once she warms up.
✔️ Show her a few good shots on the back of the camera.
This builds trust and helps her understand what works.
✔️ Compliment her when she nails a pose.
Even pros love hearing “This is AMAZING!”
✔️ Be respectful if you need to correct anything.
Instead of “No, that looks weird,” say:
“Let’s try a different angle — I think this one could work even better!”
✔️ Play her favorite playlist if possible.
Music helps models relax and vibe into the shoot.
🚫 What to Avoid:
- Ignoring the model (makes them stiff or insecure)
- Taking too long to adjust lights while she waits in heels
- Letting assistants distract the model during poses
- Over-posing the model like a puppet — she’s a creative too!
5. During the Shoot: Keep the Flow Alive
At this point, you’ve:
- Set up the lights
- Prepped the space
- Styled the look
- Directed the model
Now it’s time to let creativity run. And trust your instincts.
Let your stylist help with clothing tweaks.
Let the makeup artist touch up shine or fix lashes.
Let your producer watch timing.
Let the model explore — she might give you something even better than planned.
Shooting Tips:
- Vary focal lengths (don’t shoot 50mm all day — go wide, go tight)
- Try a low-angle or high-angle perspective
- Change model’s position: sitting, standing, walking, leaning
- Always take a moment to step back and look at the full shot: Does it still match the concept?
6. Wrapping Up Like a Pro
When you’ve got the shots you need:
✔️ Take backup copies immediately
✔️ Start packing with care (don’t just dump stuff into bags!)
✔️ Thank your team — they helped you make this happen
✔️ Review the best shots together if time allows
✔️ Talk about next steps (when team can expect photos, behind-the-scenes, etc.)
Be the person they want to work with again.
What Happens After the Shoot?
A little preview of what’s next:
- You’ll sort and select the best shots
- Start editing or send to your retoucher
- Prep for publication or client delivery
(We’ll go deep into that in the next section: Retouching + Publishing)
✅ Quick Recap of Part 5:
- Arrive early and set the tone
- Keep moodboard visible
- Set lights with safety in mind
- Guide the model with warmth and clarity
- Let your team contribute
- Capture the story — not just pretty pictures
- End the day with gratitude and backup drives
Part 6: Retouching & Publication – From RAW to Runway
You’ve wrapped the shoot. You’re tired but thrilled. The model crushed it. The clothes were on point. The lighting? Glorious.
Now comes the next step: making those RAW files shine.
Let’s break it down.
1. Retouching – The Right Way
First off, let me say something important:
A perfect retouch will never save a badly shot image. But a great image only needs a touch-up to become powerful.
So don’t rely on post-production to fix everything.
Your editing should enhance the story — not rewrite it.
If You’re Retouching the Photos Yourself:
✅ Start with Camera RAW or Lightroom
Fix white balance • Basic color correction • Contrast & highlights • Crop and straighten • Slight exposure adjustments
💡 Keep your favorite image in mind and try to match the rest to it — for consistency.
✅ Then move to Photoshop for:
Skin cleanup (blemishes, flyaways) • Dodge & burn (subtle, not plastic) • Color grading • Background fixes (removing distractions) • Clothing wrinkles or shape corrections
Retouching Tips for Editorial & Lookbook:
✔️ Avoid plastic skin — magazines hate that
✔️ Maintain skin texture
✔️ Match your final color tones to the moodboard’s palette
✔️ Don’t over-sharpen
✔️ Always export in high-res and web-res
If You’re Outsourcing to a Retoucher:
✔️ Send clear instructions:
- Which photos to edit
- The desired retouching style (with reference images)
- What to keep and what to change
✔️ Tell them:
- Where it will be published (print vs digital, which magazine)
- Deadline (including buffer time for revisions)
- Your own expectations (minimal vs high-end beauty retouch)
💥 One thing to NEVER do:
Deliver a completely different edit from the agreed moodboard without informing your client or collaborators.
It’s a team effort — everyone expects to see their work (makeup, styling, lighting) presented as planned.
2. Final Delivery to Client (for Lookbook & Campaigns)
If you were hired by a brand or designer, here’s what you usually need to deliver:
✔️ A final set of fully retouched, high-resolution images
✔️ Cropped versions for:
- Social media
- Website banners
- Product close-ups
✔️ Black & white versions if required
✔️ PDF contact sheet with all final images and filenames
✔️ Optional: short video clips or behind-the-scenes reels
📦 Send everything neatly via:
- WeTransfer
- Google Drive folder
- Dropbox Pro
Label your folders smartly:
CopyEditBrandName_Lookbook_Spring2025/
├── HiRes/
├── WebRes/
├── BTS/
├── ContactSheet.pdf
Make it easy for the brand team to find and use your work. They’ll love you for it.
3. Publishing in a Magazine – How It Really Works
If this was your own creative editorial, and you want to get it published — good news:
You absolutely can.
You just need to know where and how to submit.
Platforms for Submission:
🎯 Kavyar – the biggest platform for submitting editorials to fashion & art magazines.
Create a profile, upload your shots, and submit to open calls.
🔍 Also check magazine websites directly (Dazed, Sicky, Dreamingless, etc.)
Most have a “Submit” section with rules.
Create a Submission PDF
What to include:
- Editorial Title (Make it catchy and relevant: “Neon Ghosts” > “Studio Test #4”)
- 2–3 strongest photos per look
- Full team credits
Photographer, model, stylist, MUA, etc. Include Instagram handles - Styling credits (label every item if possible) Example:
Top – Zara
Skirt – H&M Studio Collection
Earrings – Vintage
📌 Save it as:
YourName_EditorialTitle_MagazineName.pdf
Publish Your Lookbook or Editorial in Gossip Stone Magazine
If you think your story has what it takes to be featured in a high-end global luxury outlet — good news again:
📸 You can submit your shoot directly to Gossip Stone, or we can help you get published in other top-tier magazines like Vogue, Elle, L’Officiel, Forbes, Grazia, Glamour, Harper’s Bazaar, GQ, and many more!
We support fresh talents, editorial artists, stylists, and brands.
And yes — we do accept amazing stories from newcomers, as long as they’re polished, concept-driven, and well-produced.
Get featured here:
👉 Get featured in Gossip Stone
👉 Get featured in top magazines
BONUS:
How to Maximize Your Chance of Being Accepted
✔️ Choose the right magazine based on your style
✔️ Submit full stories (minimum 6–8 final images)
✔️ Stick to the magazine’s submission guidelines
✔️ Be responsive and ready to provide hi-res versions quickly if accepted
✔️ Don’t submit the same story to multiple magazines unless allowed
Final Checklist Before Submitting Your Editorial
✔️ All images are final, clean, consistent
✔️ Color grading fits your original moodboard
✔️ No typos in the credits
✔️ Model release and team contracts signed
✔️ Retouched to professional standard
✔️ PDF is under 10 MB
✔️ Folder of hi-res images ready to go
How to Promote Your Publication
Once you’re published:
✔️ Share on social media
✔️ Tag all team members
✔️ Thank the magazine
✔️ Update your portfolio and Behance
✔️ Post behind-the-scenes stories — people love them!
📧 Sample Cover Letter Email for Fashion Editorial Submission
Subject Line: Editorial Submission: “[Editorial Title]” – Submission for [Magazine Name]
Dear [Editor’s Name] / Dear [Magazine Team],
I hope this message finds you well.
My name is [Your Full Name], and I’m a [your role – e.g., fashion photographer, creative director] based in [City/Country]. I would like to submit an editorial titled “[Editorial Title]” for your consideration for publication in [Magazine Name].
This story was inspired by [brief creative concept – e.g., “the contrast between brutal urban architecture and soft, dreamy silhouettes of post-modern femininity”]. The team and I have carefully curated the looks, makeup, and styling to reflect [mood/theme], all aligning with the current trends and aesthetics often featured in your publication.
The submission includes:
- 10 retouched high-resolution images (web and print-ready)
- Full team and styling credits
- A moodboard and concept description (if required)
- Model release (available upon request)
The editorial is currently unpublished and exclusive to your magazine for review. We are happy to provide additional assets or answer any questions if needed.
Please let me know if you require any specific formats or additional documents.
Thank you for your time and consideration. It would be a pleasure and honor to be featured in [Magazine Name].
Looking forward to your feedback!
Warm regards,
[Your Full Name]
[Your Role – Photographer / Stylist / Creative Director, etc.]
[Phone Number]
[Email Address]
[Website / Portfolio Link]
Instagram: @yourhandle
✨ Optional Attachment Suggestions:
Moodboard (if relevant)
Editorial PDF presentation
Team credits (PDF or .docx)
Low-res preview JPGs
The best editorials don’t follow trends. They start them.
If you’d like me to cover more details on any of the topics mentioned — or if you’re curious about other photography tips like how to shoot runway shows, how to pose models, how to find clients, or anything else — just drop a comment ✍️ under the Instagram post promoting this article. I’d love to hear what you’d like to see next! 💬📸